Who doesn’t love cookies? Now, imagine them in a fun, crunchy, stick-like form—perfect for dipping, gifting, or snacking! Cookie sticks are a unique take on traditional cookies, offering a crispy texture, easy portability, and endless flavor possibilities.
In this article, we’ll explore everything about cookie sticks—from their origins to step-by-step baking instructions, different varieties, and expert tips to troubleshoot common baking mistakes. Whether you’re a seasoned baker or a newbie in the kitchen, this guide will help you master the art of making cookie sticks effortlessly.
So, grab your mixing bowl and let’s dive in!
Introduction

What Are Cookie Sticks?
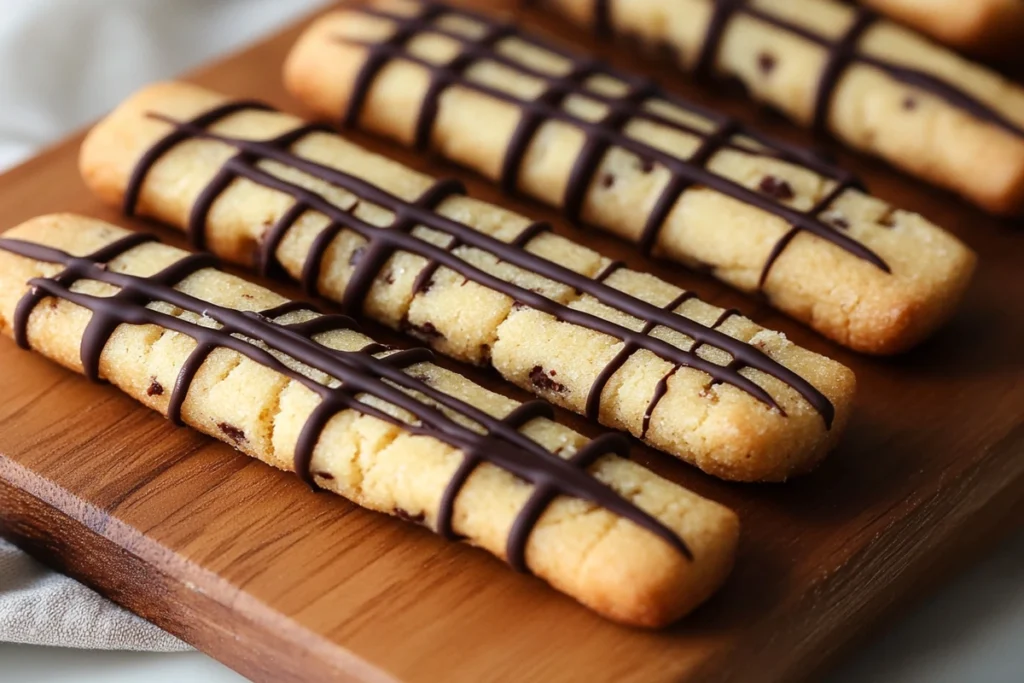
Cookie sticks are exactly what they sound like—cookies shaped like sticks! Unlike traditional round cookies, these are long, slender, and slightly crunchy, making them perfect for dipping in chocolate, coffee, or milk. They resemble biscotti but have a softer bite, making them an excellent snack for all ages.
Why Are Cookie So Popular?
The popularity of cookie sticks has skyrocketed for several reasons:
- Easy to Make: Unlike rolled-out or cut cookies, these require minimal effort—just shape, bake, and enjoy!
- Great for Dipping: Their stick shape makes them ideal for dipping in melted chocolate, peanut butter, Nutella, or even coffee.
- Perfect for Gifting: Packaged in a decorative jar or box, they make excellent homemade gifts.
- Less Messy: Since they don’t crumble easily, they’re a great snack for kids and on-the-go munching.
How Cookie Differ from Traditional
| Feature | Traditional Cookies | Cookie Sticks |
|---|---|---|
| Shape | Round, irregular | Long, stick-like |
| Texture | Soft or chewy | Slightly crunchy |
| Best For | Snacking, plating | Dipping, gifting |
| Ease of Making | Medium (cutting, shaping required) | Easy (just roll and bake!) |
Unlike traditional cookies, cookie sticks have a crispier texture, making them more versatile for snacking and dipping. Whether you enjoy them plain, coated in chocolate, or sprinkled with nuts, they’re sure to be a hit!
For other cookies recipes : The Ultimate Guide to Basketball Cookies – Recipes, Decoration, and Buying Tips or The Ultimate Guide to Dinosaur Cookies – Recipes, Decorating Tips & More
The History and Evolution
Origins
While cookie sticks may seem like a modern creation, their concept has deep roots in baking traditions worldwide. Many cultures have long crafted elongated, crispy cookies similar to today’s cookie sticks. For instance, Italian biscotti and French sablés share similarities in texture and shape. These baked goods were designed for easy dipping and long shelf life, making them a practical snack.
How its Became a Trend
Over time, bakers started experimenting with shapes, leading to the rise of cookie sticks as a fun and versatile snack. Unlike traditional cookies, their elongated shape made them perfect for dipping in melted chocolate, coffee, or milk—a game-changer for cookie lovers! Social media platforms further popularized these treats, with people showcasing beautifully decorated cookie sticks for holidays, birthdays, and even wedding favors.
Regional Variations
Different parts of the world have their unique versions of cookie sticks:
- Italy: Biscotti—twice-baked and crunchy, often paired with coffee.
- France: Sablé sticks—delicate, buttery, and sometimes dipped in chocolate.
- Japan: Pocky—a modern take on cookie sticks, coated in flavored chocolate.
- USA: Cookie sticks became a hit in American bakeries, especially around holidays.
Their growing popularity proves that cookie sticks are here to stay, evolving with new flavors and decorations!
A Step-by-Step Guide

Essential Ingredients
Before you start baking, gather these simple ingredients:
| Ingredient | Amount | Purpose |
|---|---|---|
| Unsalted butter | 1 cup (226g) | Adds richness and flavor |
| Granulated sugar | ¾ cup (150g) | Sweetens and adds crispiness |
| Vanilla extract | 1 tsp | Enhances flavor |
| Salt | ½ tsp | Balances sweetness |
| Egg yolk | 1 large | Provides structure |
| All-purpose flour | 2 ⅔ cups (335g) | Forms the base |
| Cornstarch | 1 tbsp | Creates a softer texture |
| Mini chocolate chips | ½ cup (85g) | Adds chocolate flavor |
| Turbinado sugar (optional) | ½ cup (100g) | Gives a crunchy coating |
| Melting chocolate | 8 oz (226g) | Used for dipping |
| Sprinkles (optional) | ⅓ cup | Decorative touch |
Step-by-Step Instructions to Make it Home
- Preheat and Prepare
- Preheat your oven to 375°F (190°C).
- Line a baking sheet with parchment paper.
- Mix the Dough
- Cream the butter, sugar, vanilla extract, and salt in a bowl until light and fluffy.
- Stir in the egg yolk.
- Add Dry Ingredients
- In a separate bowl, whisk flour and cornstarch.
- Gradually add the dry mixture to the wet ingredients, stirring between additions.
- Fold in the mini chocolate chips.
- Shape the Cookie
- Scoop a tablespoon of dough and roll it into a smooth ball.
- Using your palms, roll it into a 6-inch stick.
- If desired, roll the sticks in turbinado sugar for extra crunch.
- Chill the Dough
- Place the shaped cookie sticks on a tray and refrigerate for 15 minutes.
- This helps prevent spreading while baking.
- Bake the Cookie Sticks
- Arrange the sticks on a baking sheet, spacing them 1-2 inches apart.
- Bake for 14 minutes or until the edges turn golden brown.
- Let them cool completely.
Pro Tips for Baking Crunchy and Delicious Cookie Sticks
- Don’t skip chilling the dough! This ensures the sticks maintain their shape.
- Use quality chocolate for dipping—it makes a big difference in flavor!
- Experiment with toppings like crushed nuts, toffee bits, or colored sugar.
Different Types to Try
One of the best things about cookie sticks is their versatility! You can easily customize them to fit any occasion, whether you prefer classic chocolate chip flavors or something unique like shortbread or gluten-free options. Let’s explore some of the most popular variations.
Chocolate Chip
If you’re a fan of classic chocolate chip cookies, you’ll love these! They have the same buttery, rich flavor but with a satisfying crunch.
How to Make Them:
- Use mini chocolate chips instead of regular ones to ensure even distribution.
- Roll the dough into long sticks for the perfect shape.
- Bake until golden brown, then dip in melted chocolate for extra indulgence!
These are perfect for dunking in milk, just like your favorite chocolate chip cookies!
Shortbread
Shortbread lovers, rejoice! This version of cookie sticks is buttery, crumbly, and melts in your mouth.
How to Make Them:
- Use only butter, sugar, and flour—no eggs needed!
- Roll the dough into sticks and bake at low heat to keep them from browning too much.
- Dip in white chocolate or caramel for a gourmet touch.
Gluten-Free and Vegan
Want to enjoy cookie sticks without gluten or dairy? Try this alternative!
How to Make Them:
- Substitute almond flour or gluten-free flour for regular flour.
- Use coconut oil or vegan butter instead of dairy butter.
- Sweeten with maple syrup or coconut sugar for a natural twist.
Holiday-Themed for Special Occasions
The best part about cookie sticks? You can easily customize them for holidays!
Fun Ideas:
- Christmas: Dip in white chocolate and sprinkle with crushed candy canes.
- Halloween: Use orange and black sprinkles for a festive look.
- Valentine’s Day: Coat in pink icing and add heart-shaped sprinkles.
No matter the occasion, cookie sticks are a fun way to celebrate!
How to Decorate and Serve

Once your cookie sticks are baked, it’s time for the fun part decorating! Whether you prefer a simple chocolate dip or a fully customized design, here’s how to make them look as amazing as they taste.
Dipping in Chocolate and Sprinkles
One of the easiest ways to elevate cookie sticks is by dipping them in chocolate.
How to Do It:
- Melt dark, milk, or white chocolate in a microwave-safe bowl.
- Dip one end of each cookie stick into the chocolate.
- Immediately sprinkle with crushed nuts, toffee bits, or colored sugar.
- Let them cool on a parchment-lined tray until the chocolate hardens.
Using Cookie Sticks for Party Platters and Gifts
These delightful treats make a great addition to party platters and gift boxes.
Ideas for Serving:
- Arrange cookie sticks in a glass jar for a stylish dessert table display.
- Pair them with hot cocoa, coffee, or tea for an interactive dipping experience.
- Package them in clear bags tied with ribbons for homemade gifts.
Pairing Cookie Sticks with Beverages Like Coffee and Milk
Since cookie sticks are perfect for dipping, why not serve them with complementary drinks?
Best Beverage Pairings:
- Milk – A classic! The crunch of cookie sticks pairs perfectly with creamy milk.
- Coffee – Chocolate-dipped cookie sticks go wonderfully with espresso or cappuccino.
- Hot Chocolate – Perfect for winter! Try dunking peppermint-flavored cookie sticks.
Now that you’ve baked and decorated your cookie sticks, they’re ready to be served, gifted, or enjoyed all on your own!
Troubleshooting Common Problems
Even the best bakers run into challenges! If your cookie sticks didn’t turn out as expected, don’t worry—here are some common issues and simple fixes to ensure perfect results every time.
Why Did My Cookie Sticks Spread Too Much?
If your cookie sticks turned into flat, oversized cookies, here’s why:
Possible Causes & Fixes:
- Butter was too soft or melted – Use cool, softened butter, not melted. Overly warm butter can cause excessive spreading.
- Dough wasn’t chilled – Always chill the dough for at least 15 minutes before baking to help it hold its shape.
- Flour was under-measured – Use the spoon-and-level method when measuring flour to ensure accuracy. Too little flour makes the dough too wet and prone to spreading.
How to Prevent Dough from Becoming Too Dry or Crumbly
If your dough is hard to roll or crumbles easily, there are a few possible reasons.
Possible Causes & Fixes:
- Too much flour – Be precise when measuring. Adding even a little extra flour can dry out the dough.
- Not enough moisture – If the dough feels too dry, add a teaspoon of milk or an extra egg yolk to help bind the ingredients.
- Overmixing – Mixing too long can make the dough tough. Once ingredients are combined, stop mixing!
How to Store and Keep Cookie Sticks Fresh for Longer
Want to keep your cookie sticks crispy and delicious for days? Here’s how:
- At Room Temperature: Store in an airtight container for up to 10 days. Adding a slice of bread to the container can help keep them fresh.
- In the Freezer: Place in a sealed container and freeze for up to 3 months. Thaw at room temperature before eating.
- Avoid Refrigeration: The fridge can make cookies stale faster due to moisture changes.
By following these tips, you’ll enjoy cookie sticks that are always crispy, flavorful, and fresh!
Frequently Asked Questions
To help you get the best results, here are answers to some of the most common questions about cookie sticks!
What Are Cookie Sticks Used For?
Cookie sticks are a fun and versatile snack! They are:
Great for dipping in chocolate, coffee, or milk.
A perfect addition to cookie platters and dessert tables.
Ideal for holiday gifts and party favors.
Why Did My Cookies Stick to the Baking Sheet?
If your cookie sticks won’t come off the baking sheet, here’s what went wrong:
No parchment paper or silicone mat – Always line your baking sheet to prevent sticking.
Hot cookies straight from the oven – Let them cool for a few minutes before removing them. Warm cookies are fragile and break easily.
How Do You Get Sprinkles to Stay on Cookies?
Want your sprinkles to stick without falling off? Try these tips:
For baked cookies: Brush with a thin layer of melted chocolate or glaze, then press the sprinkles on.
Before baking: Press sprinkles into the dough lightly so they stick during baking.
Can You Freeze Chocolate Chip Cookie Sticks?
Yes! Cookie sticks freeze really well. Place them in a sealed container with parchment paper between layers. To enjoy, simply let them thaw at room temperature for a few minutes.
Now that you have all the answers, it’s time to bake your perfect batch of cookie sticks!
Print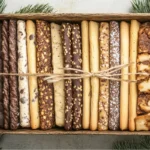
Cookie Sticks – A Fun and Delicious Twist on Classic Cookies
- Total Time: 30 minutes
- Yield: 24 cookie sticks 1x
Description
These cookie sticks are the perfect balance of crunchy and sweet, making them ideal for dipping, gifting, or enjoying as a snack. Whether coated in chocolate, sprinkled with sugar, or served plain, these easy-to-make cookie sticks will become your new favorite treat!
Ingredients
- 1 cup (226g) unsalted butter, softened
- ¾ cup (150g) granulated sugar
- 1 teaspoon vanilla extract
- ½ teaspoon salt
- 1 large egg yolk
- 2 ⅔ cups (335g) all-purpose flour
- 1 tablespoon cornstarch
- ½ cup (85g) mini chocolate chips
- ½ cup (100g) turbinado or coarse sugar (optional)
- 8 oz (226g) melting chocolate (dark, milk, or white)
- ⅓ cup sprinkles (optional)
Instructions
- Preheat and Prepare – Preheat your oven to 375°F (190°C) and line a baking sheet with parchment paper.
- Mix the Dough – In a large bowl, beat the butter, sugar, vanilla extract, and salt until light and fluffy. Stir in the egg yolk.
- Combine Dry Ingredients – In a separate bowl, whisk together flour and cornstarch. Gradually add this to the wet ingredients, stirring after each addition.
- Add Chocolate Chips – Fold in mini chocolate chips and mix until well combined.
- Shape the Cookie Sticks – Take a tablespoon of dough, roll it into a smooth ball, then shape it into a 6-inch stick using your palms. If desired, roll the sticks in turbinado sugar for extra crunch.
- Chill the Dough – Place the shaped sticks on a tray and refrigerate for 15 minutes. This helps them hold their shape while baking.
- Bake – Arrange the cookie sticks on a parchment-lined baking sheet, spacing them 1-2 inches apart. Bake for 14 minutes or until the edges turn golden brown.
- Cool Completely – Allow the cookie sticks to cool before decorating.
- Decorate (Optional) – Dip each cooled cookie stick into melted chocolate and top with sprinkles. Let the chocolate set before serving.
Notes
- Storage: Store in an airtight container at room temperature for up to 10 days. Freeze for up to 3 months for longer storage.
- Dough Consistency: If the dough feels too dry, add 1 teaspoon of milk to improve texture.
- Prevent Spreading: Always chill the dough before baking to maintain the perfect stick shape.
- Dipping Tip: For best results, use high-quality chocolate for dipping and let it set at room temperature.
- Prep Time: 15 minutes
- Cook Time: 15 minutes
- Category: breakfast
- Method: Dessert
- Cuisine: American
Nutrition
- Serving Size: 1 cookie
- Calories: 110 kcal
- Sugar: 6g
- Sodium: 81mg
- Fat: 6g
- Saturated Fat: 4g
- Carbohydrates: 13g
- Fiber: 1g
- Protein: 1g
- Cholesterol: 18mg
Keywords: cookie sticks