Introduction
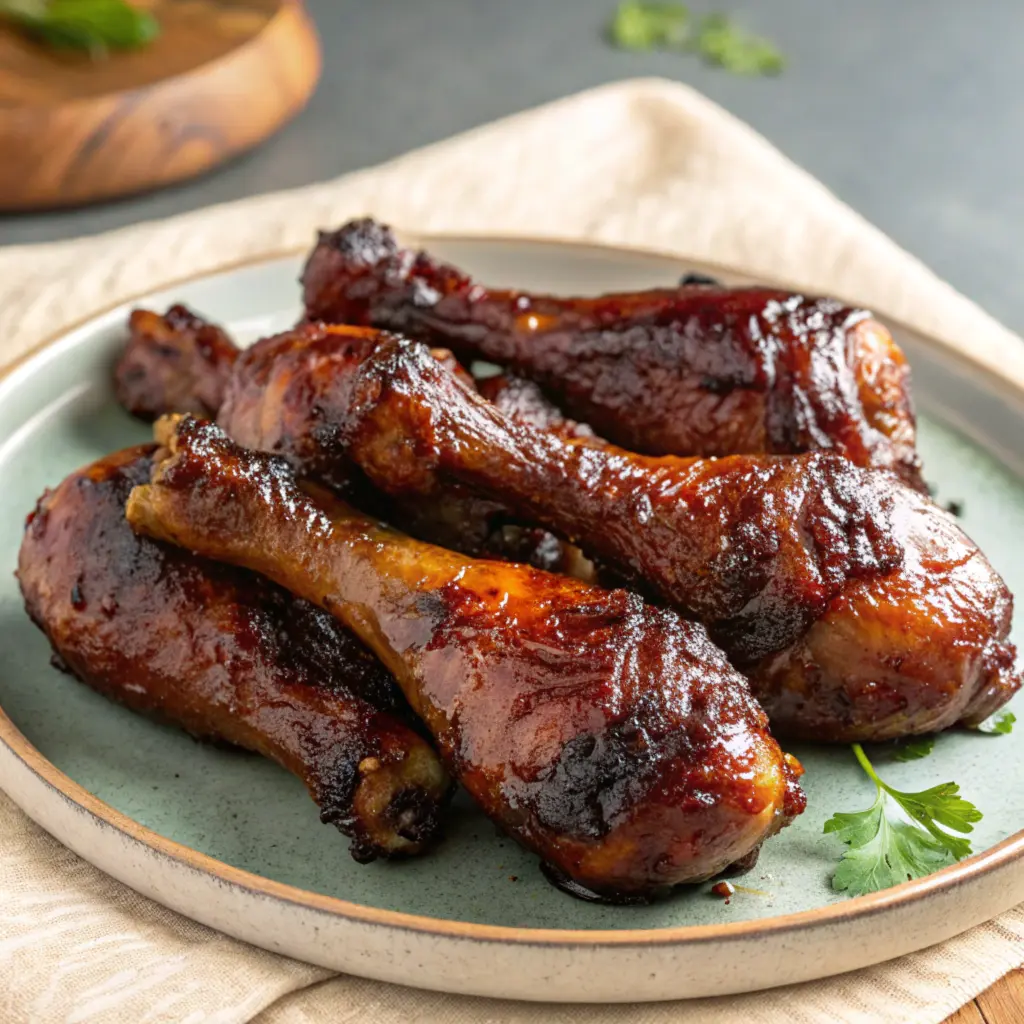
Smoking chicken drumsticks is a classic way to turn a simple cut of meat into something extraordinary. It’s not just about cooking; it’s about infusing flavor and locking in tenderness. In this guide, we’ll break down everything you need to know to smoke chicken drumsticks perfectly. You’ll find advice on selecting quality meat, seasoning techniques, wood choices, and precise cooking steps. Let’s get started with Part 1, where we discuss the essentials for selecting and preparing your drumsticks.
Choosing the Best Chicken Drumsticks
Why Quality Chicken Matters
When it comes to smoked chicken drumsticks, starting with high-quality chicken makes all the difference. The grade of chicken you buy affects the final taste and texture. Opt for organic or free-range drumsticks if possible. These options often have a better texture and richer flavor.
What to Look for in Chicken Drumsticks
Make sure the drumsticks are of a similar size. This ensures even cooking. The skin should be intact and free of tears, as it helps retain moisture while smoking.
- Chicken Grades: Select drumsticks labeled USDA Grade A for freshness and consistent quality.
- Freshness Tip: Check for a pinkish hue, as pale or grayish meat might be less fresh.
How to Prepare Chicken for Smoking
Before seasoning or brining, take a moment to properly prepare the chicken. Rinse the drumsticks under cold water, pat them dry with paper towels, and remove any excess fat or skin flaps. Trimming these not only improves the presentation but also prevents flare-ups during smoking.
Seasoning and Brining Essentials
For the best flavor, season the chicken well or brine it beforehand. Brining locks in moisture, ensuring the meat stays juicy even during long smoking sessions.
Simple Brine Recipe
In a large bowl, combine:
- 8 cups of water
- 1/4 cup kosher salt
- 1/4 cup brown sugar
- Optional: garlic cloves, black peppercorns, and fresh herbs
Let the drumsticks sit in the brine for 2-4 hours. Afterward, rinse them and pat them dry before applying a seasoning rub.
Dry Rub Magic
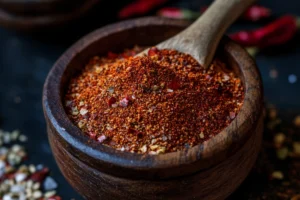
A well-crafted dry rub enhances the smokiness of the chicken. Combine smoked paprika, garlic powder, onion powder, brown sugar, salt, black pepper, and a pinch of cayenne. Rub the mixture generously over each drumstick, making sure to get into every nook and cranny.
Pro Tips for Preparation
Choosing the Right Wood and Mastering Smoking Techniques
Selecting the Best Wood for Smoking Chicken Drumsticks
The type of wood you use for smoking can significantly impact the flavor of your chicken. Smoked chicken drumsticks pair wonderfully with woods that offer mild, slightly sweet, or fruity flavors. Too strong a wood can overwhelm the chicken’s delicate taste, so choose wisely.
Top Wood Choices for Smoking Drumsticks
- Applewood: Known for its subtle sweetness, it gives chicken a mild and fruity aroma.
- Hickory: Offers a stronger, earthy flavor perfect for a bold, smoky finish.
- Cherrywood: Adds a reddish hue to the meat along with a lightly sweet taste.
- Pecan: A mild option that brings a nutty undertone without overpowering.
When in doubt, try mixing woods, like cherry and hickory, to balance smokiness and sweetness. Start with a small amount of wood, as too much smoke can make the chicken taste bitter.
Ideal Smoking Temperatures and Equipment
The key to smoking tender, juicy drumsticks is maintaining a consistent low-and-slow temperature. Set your smoker to 225°F, which allows the meat to cook evenly while absorbing plenty of smoky flavor.
Equipment Essentials
- Smoker Type: Pellet, offset, electric, or charcoal smokers all work well. Choose one you’re comfortable using.
- Thermometer: Invest in a reliable meat thermometer to monitor both the internal temperature of the drumsticks and the smoker itself.
Step-by-Step Smoking Process
- Preheat Your Smoker
Set the smoker to 225°F and allow it to come up to temperature. Add your chosen wood chips or pellets. If using charcoal, wait until the coals are glowing red before adding wood. - Prepare the Chicken
Arrange the seasoned drumsticks on the smoker grates, leaving enough space between each piece for air to circulate. - Optional: Use a Water Pan
Place a small pan of water inside the smoker. The moisture helps keep the chicken tender and prevents it from drying out. - Monitor the Smoke
Aim for a thin, blue smoke rather than thick clouds. This ensures a balanced flavor without bitterness. - Flip for Even Cooking
About halfway through the cooking time, flip the drumsticks to ensure even smoking on both sides. - Internal Temperature Check
After approximately 90 minutes, begin checking the internal temperature of the drumsticks. The safe and ideal temperature for chicken is 165°F.
Tips for Flavor Boosting During Smoking
- Basting: Brush the drumsticks with melted butter or a mix of honey and barbecue sauce during the final 20 minutes. This adds a glossy finish and extra flavor.
- Foiling Trick: For extra juiciness, wrap the drumsticks in aluminum foil once they reach 150°F. Finish them unwrapped to crisp up the skin.
What Makes 225°F the Perfect Temperature?
Cooking at 225°F allows the collagen in the chicken to break down gently, creating juicy, tender meat. It also provides ample time for the smoky flavors to penetrate the drumsticks.
Achieving Crispy Skin and Finishing Touches
Why Crispy Skin Matters
Let’s face it, nobody enjoys biting into soggy chicken skin. The smoky flavor is essential, but crispy skin adds that satisfying crunch. Achieving crispy skin on smoked chicken drumsticks takes a bit of extra care, but it’s absolutely doable.
Secrets to Crispy Skin on Smoked Chicken Drumsticks
- Pat Dry Before Smoking
Moisture is the enemy of crispy skin. Use paper towels to pat the drumsticks dry thoroughly before applying seasoning. If you brined the drumsticks, this step is even more critical. - Cook at Higher Heat Toward the End
Although smoking at 225°F is ideal for most of the cooking process, raising the temperature to 375°F for the last 15–20 minutes crisps up the skin. If your smoker doesn’t allow high heat, transfer the drumsticks to a preheated grill or oven to finish them off. - Avoid Excess Oil
While it might seem counterintuitive, too much oil can make the skin greasy rather than crispy. A light brush of oil before seasoning is fine, but don’t overdo it. - Let the Skin Tighten Naturally
Once the drumsticks are cooked, allow them to rest for a few minutes. The skin firms up slightly as it cools, making it even crispier when you bite in.
Finishing Techniques: Grill or Broil for Perfection
To add a final layer of texture and flavor:
- Grilling Option: Heat a gas or charcoal grill to high heat. Place the drumsticks directly on the grates for 2–3 minutes per side to create char marks and crisp up the skin.
- Broiling Option: Set your oven to broil. Place the drumsticks on a wire rack and broil for about 3–4 minutes, keeping a close eye to prevent burning.
Should You Sauce Smoked Chicken Drumsticks?
Adding sauce is entirely up to personal preference. If you enjoy a sticky, tangy finish, brush barbecue sauce onto the drumsticks during the last 10 minutes of cooking. Let the sauce caramelize slightly for a rich, smoky glaze.
For those who prefer dry-rubbed chicken, skip the sauce altogether. Instead, add an extra sprinkle of seasoning before serving for bold flavor.
Quick Tips for Success
- Keep It Simple: Too many steps can overcomplicate things. Stick to one or two finishing methods for the best results.
- Timing Is Key: Avoid rushing the process. Crispy skin is a reward for your patience!
Monitoring Internal Temperature for Safe and Delicious Drumsticks
Why Internal Temperature Matters
Cooking smoked chicken drumsticks to the right internal temperature isn’t just about food safety—it’s about ensuring perfect texture and flavor. Undercooked chicken is unsafe, while overcooked chicken can be dry and tough. Striking the right balance is crucial.
Safe Cooking Temperature for Chicken Drumsticks
The USDA recommends cooking chicken to an internal temperature of 165°F to kill harmful bacteria. For dark meat like drumsticks, you can go slightly higher—about 175°F to 185°F—without losing tenderness. At this range, the connective tissue melts, making the meat more flavorful and fall-off-the-bone tender.
Using a Meat Thermometer
- Choose the Right Thermometer
Use a digital meat thermometer for the most accurate readings. Instant-read models are especially helpful. - Where to Insert the Thermometer
Insert the thermometer probe into the thickest part of the drumstick, avoiding the bone. Bone conducts heat and can give a false reading. - Check Multiple Drumsticks
Smoking can cause slight temperature variations across the grill, so check the temperature of at least two or three drumsticks.
Tips for Monitoring Temperature While Smoking
- Start Checking Early: Begin checking the internal temperature about 75–90 minutes into smoking. This prevents overcooking.
- Use a Dual-Probe Thermometer: Some thermometers allow you to monitor the smoker’s ambient temperature and the meat’s temperature simultaneously.
- Don’t Lift the Lid Too Often: Each time you open the smoker, heat escapes, causing fluctuations that extend the cooking time.
The Resting Phase: Why It’s Important
Once your drumsticks reach the desired temperature, remove them from the smoker and let them rest for 5–10 minutes. Resting allows the juices to redistribute throughout the meat, ensuring every bite is tender and flavorful.
- Pro Tip: Tent the drumsticks loosely with aluminum foil during the resting phase to retain heat without steaming the skin.
Frequently Asked Questions (FAQs) About Smoking Chicken Drumsticks
How long to smoke chicken drumsticks?
The average smoking time for chicken drumsticks at 225°F is around 1.5 to 2 hours. However, factors like the size of the drumsticks, smoker efficiency, and weather conditions can influence the timing. Use a meat thermometer to confirm doneness.
What is the ideal temperature to smoke chicken drumsticks?
Maintaining a smoker temperature of 225°F is ideal for slow cooking. For crispy skin, finish the drumsticks by increasing the heat to 375°F for the last 10–15 minutes.
How can I achieve crispy skin on smoked drumsticks?
To get crispy skin:
- Pat the drumsticks dry before seasoning.
- Cook low and slow initially, then crank up the heat towards the end.
- Use methods like grilling or broiling to create that golden-brown crunch.
Should I brine chicken drumsticks before smoking?
Absolutely! Brining adds moisture and enhances flavor. A simple saltwater brine, optionally enhanced with sugar and aromatics, works wonders. Let the drumsticks soak for at least 2–4 hours for the best results.
What wood chips are best for smoking chicken drumsticks?
Mild and fruity woods like applewood, cherrywood, and pecan are fantastic choices for chicken. Avoid heavier woods like mesquite, which can overpower the delicate flavors.
How do I know when smoked chicken drumsticks are done?
The drumsticks are ready when the internal temperature reaches 165°F. For a more tender result, you can cook dark meat up to 175°F without drying it out.
Conclusion:
By following these tips, avoiding common mistakes, and understanding the nuances of smoking, you’ll soon be serving up irresistible smoked chicken drumsticks every time. Whether you’re prepping for a family dinner or impressing guests at a backyard barbecue, this dish will always be a crowd-pleaser.
Happy smoking, and don’t forget to pair your drumsticks with complementary sides and sauces for a complete feast!
chicken saver our lunch every times : The Ultimate Guide to Crafting a Perfect Chicken Parm Sandwich or baked chicken : The Ultimate Guide to Perfectly Baked Chicken Cutlets: Recipes & Tips


1 thought on “How to Smoke Perfect Chicken Drumsticks: Tips, Techniques, and FAQs”